Conditional logic changes what people see when they fill out a form, depending on their previous answers. This improves the experience, especially when the form is long or complex. Splitting online forms into multiple pages and applying conditional rules can help make it easier and quicker to fill out. This means it’s possible to ask some questions only when relevant or to route people down different paths. As a result, the quality of data collected often also improves.
There are two types of conditional logic now available in GC Forms.
- Display logic: to show a question dynamically as a follow-up based on a specific answer being selected.
- Branching logic: to route people through different flows based on the answer selected.
To allow for branching logic, we’ve added pages as a feature that allows you to structure your form, with groups of questions that are displayed together.
Creating a multi-page form
GC Forms now allows you to create multi-page forms. Online forms typically work best when they ask about one thing per page. Focusing on one topic or question at a time helps lower the cognitive load experienced by people filling out the form. This can make the form less overwhelming and easier to understand and navigate.
Adding a new page:
- Create a form in GC Forms.
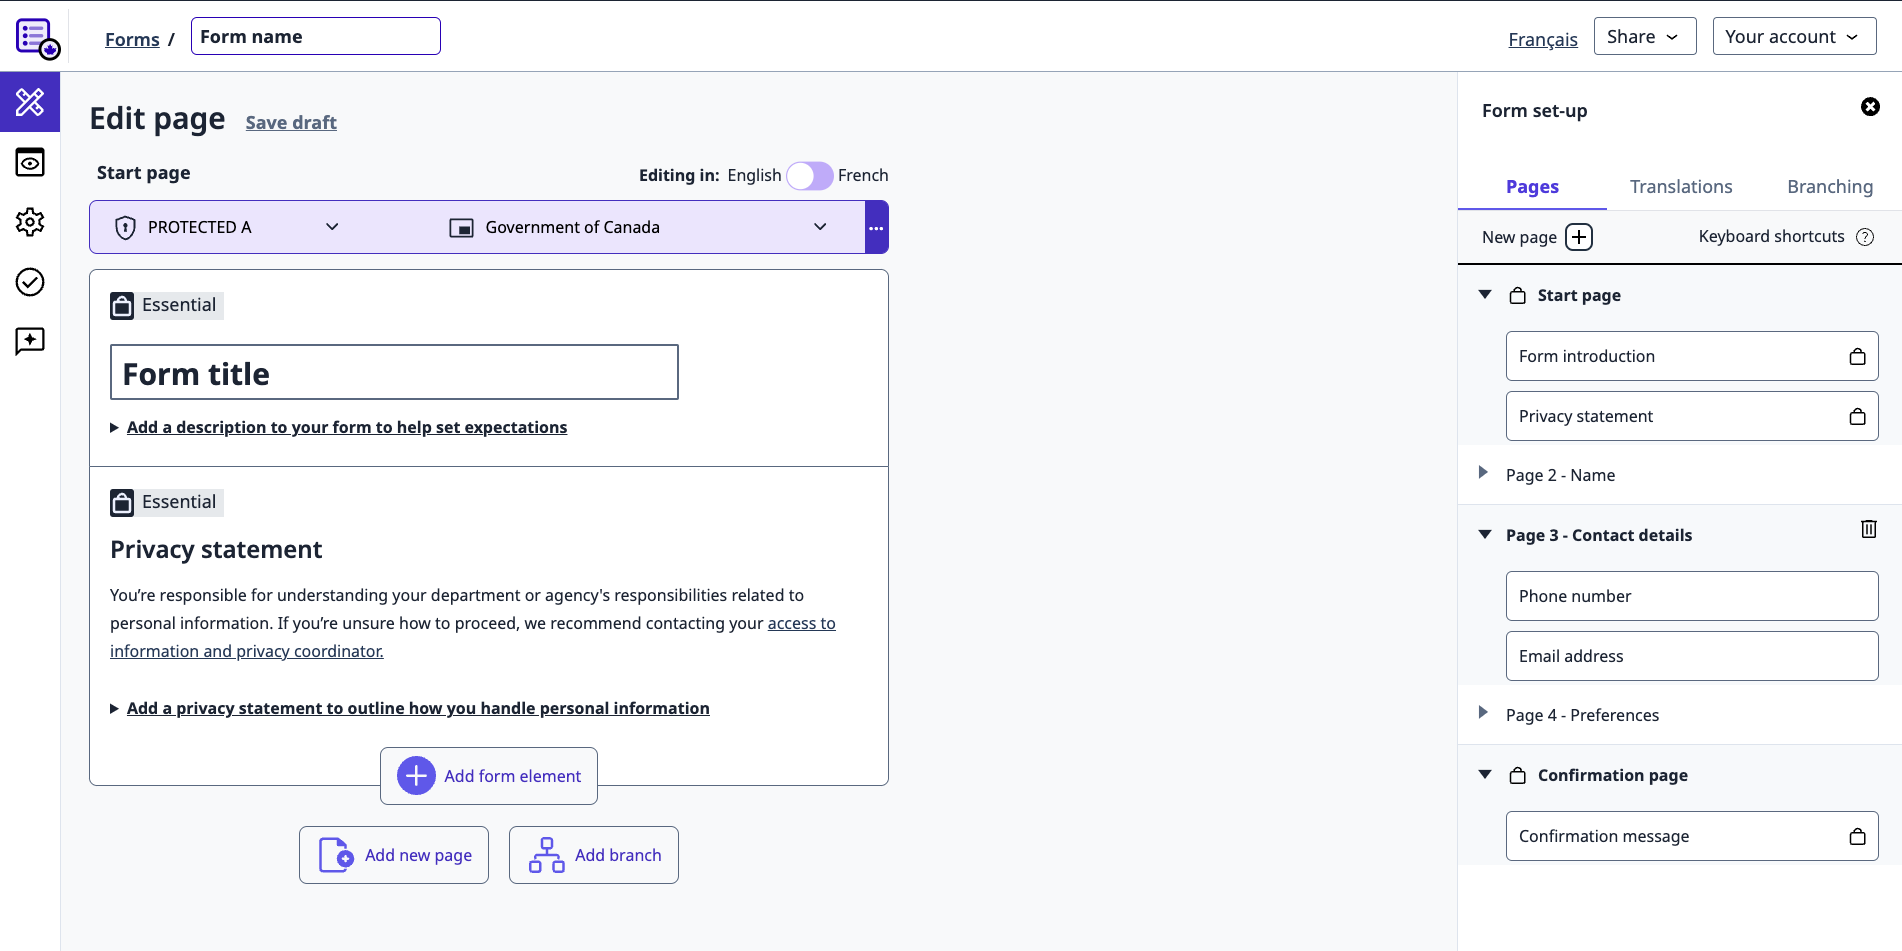
- Open the “Form set-up” panel on the right side of the screen.
- Navigate to the “Pages” tab within the panel. From here, you can add a “New Page”.
- New pages will be added after the Start page (first page of your form by default, which includes the introduction and privacy statement) and prior to the Review page (where people filling out the form will be able to check their answers before submitting their response), and finally the Confirmation page (which appears once a form is submitted).
- Give your page a name for internal reference and a page title which will be displayed to the people filling out the form.
- In the “Pages” tab, drag and drop questions and pages to reorder and reorganize your form.
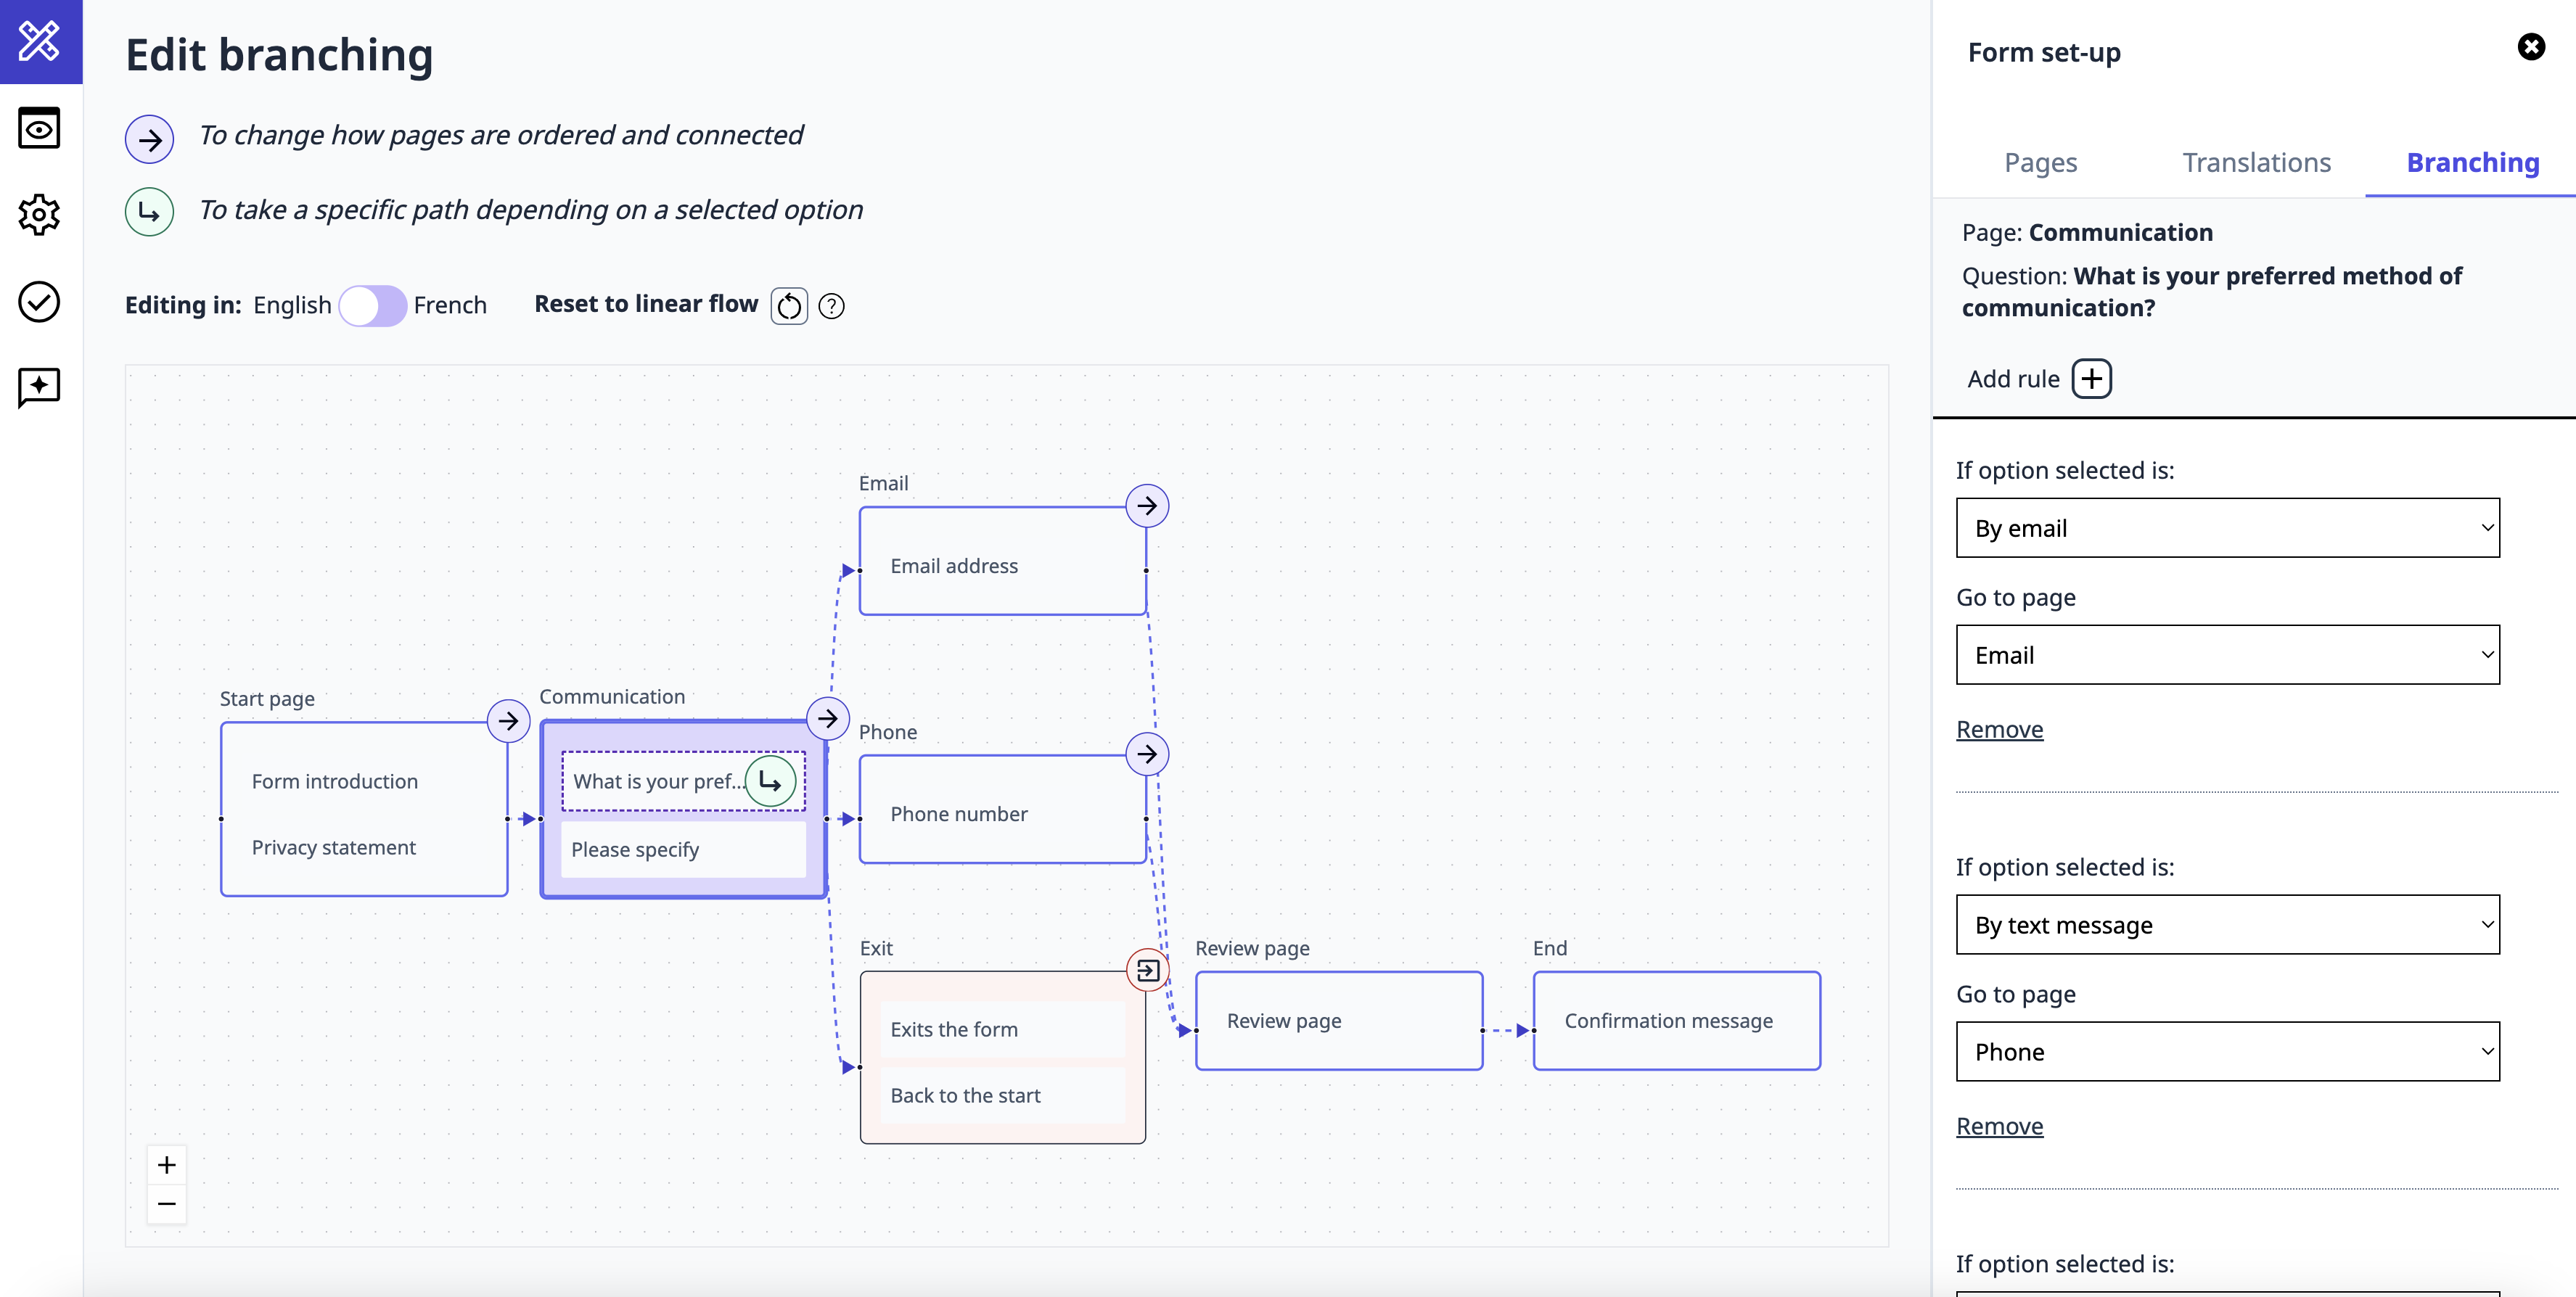
- In the “Form set-up” panel, navigate to the “Branching” tab to visualize the entire form flow and connections between pages at a high level.

Applying display logic to a form
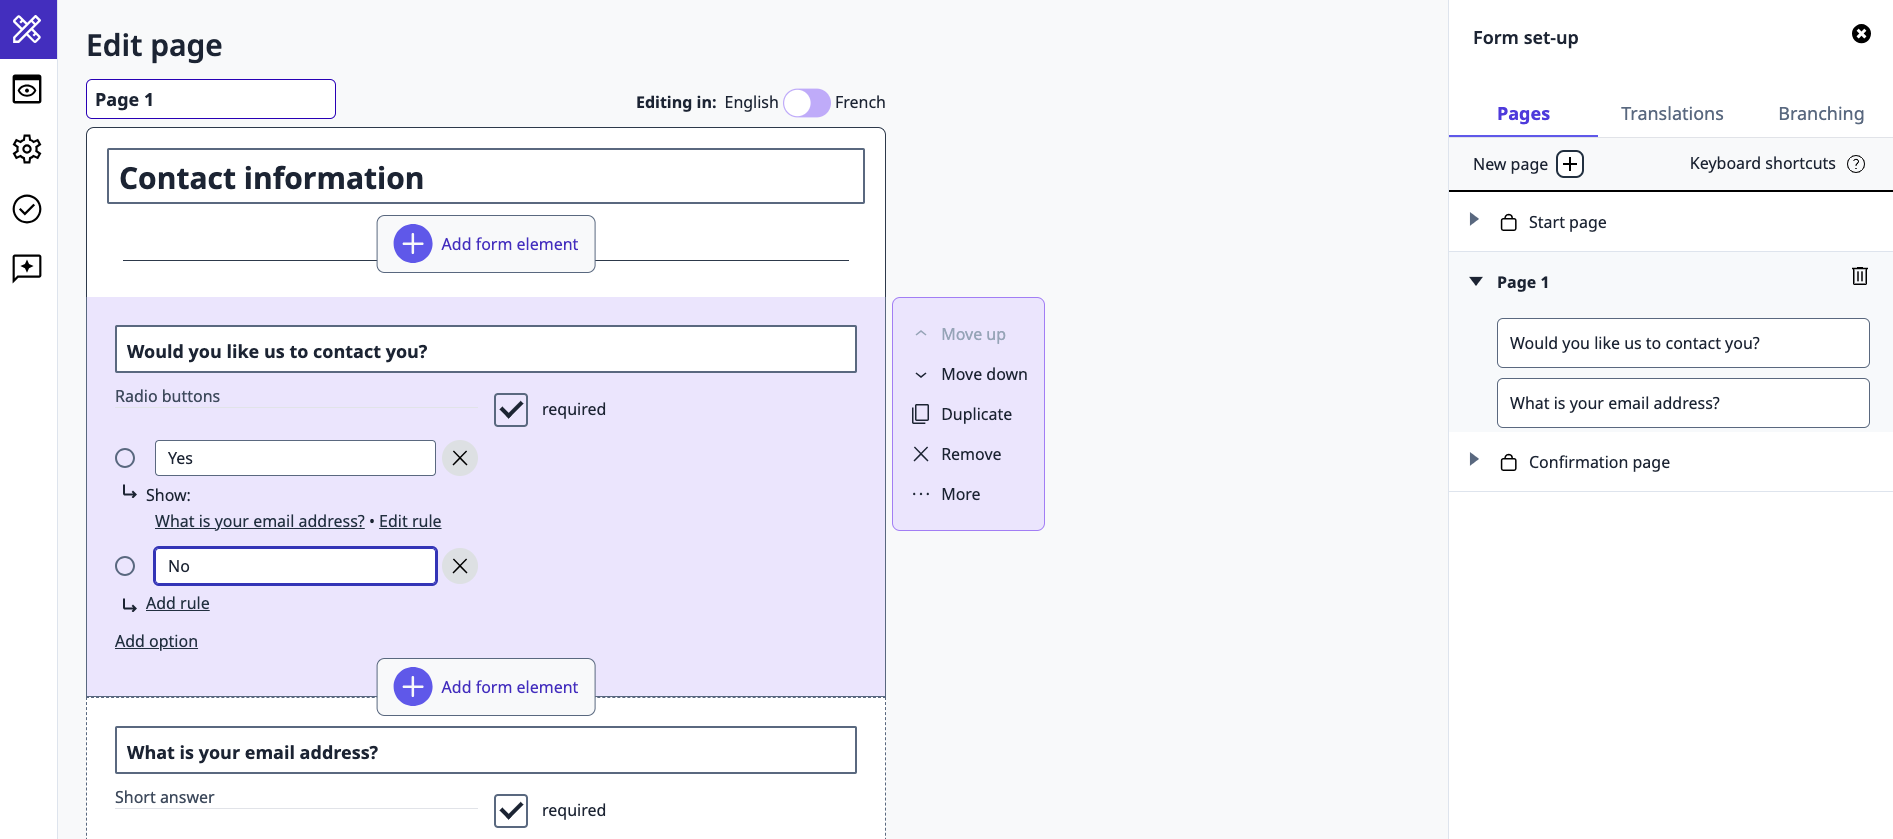
Display logic uses “if”/”then” or “show”/”hide” rules to dynamically show questions based on previous answers selected by people filling out the form. Currently, this is available for form elements with selectable options, such as radio buttons, checkboxes, and dropdowns.
Adding display rules to dynamically show related follow-up questions:
- Create a form in GC Forms.
- Add a form element that allows you to select an option, such as radio buttons, checkboxes or dropdown list.
- Add multiple options to the question selected.
- Add another form element that will be dependent on choosing a specific answer above.
- Select the option to associate with a conditional display.
- Go to “Add a rule”.
- In the “Add a display rule” modal, select which option, if answered, will decide if the subsequent question appears.
- Select which question will show on selection and save.
- Add as many rules as is relevant.
- You can also use the shortcut “Add Other option” to insert a conditional text input field when “Other” is selected by the person filling out the form.
Note: Responses will only include data for questions that were shown to the person filling out the form. Hidden questions that do not apply will not appear, while visible but unfilled questions will appear as a blank entries in response data.

Applying branching logic to a form
Branching logic gives you the ability to take people down different paths within the form depending on their answers. You can create multiple separate flows splitting out form content to show people only the pages that are relevant to them. Currently, this is available for forms with more than one page. Just like display logic, branching is a function of form elements with selectable options, such as radio buttons, checkboxes, and dropdowns.
Adding branches to route people filling out the form down different paths
- Create a form in GC Forms.
- Add a form element that allows you to select an option, such as radio buttons, checkboxes or dropdown list.
- Add multiple options to the question selected.
- Add a subsequent page to your form that will be the destination when choosing a specific option above.
- Open the “Form set-up” panel on the right side of the screen.
- Navigate to the “Branching” tab.
- Select an option (indicated with the green bent arrow icon).
- Select “Add a rule” to split the flow based on the option and take people to a specific page based on its selection.
- Applying multiple “rules” or instances of conditional branching questions on a single page can lead to messy and confusing forms. A best practice is to limit the number of questions per page and allow only one selection-type question to branch into multiple independent paths from a single node.
- Make sure to test all branching paths before publishing to ensure the form works as expected. You can test your form by going to the preview option called “Test” in the side navigation.
- Should your branching pattern get messy and convoluted, you can remove all branching by resetting to a linear flow. You can find this option in the “Branching” tab of the “Form set-up” panel.
- Branching allows you to create parallel flows that will ultimately lead to the Review page to submit the form and Confirmation page afterwards.
- If you wish to have people exit the form flow earlier when ineligible to continue, you can convert a page to an “exit page” in the flow, by selecting the the purple right arrow icon in “Branching”. You’ll be able to customize the exit page content in “Pages”.
Note: The stored response data will only include the conditional branching paths followed by the person who completed the form.
